Tuesday, 28 April 2015

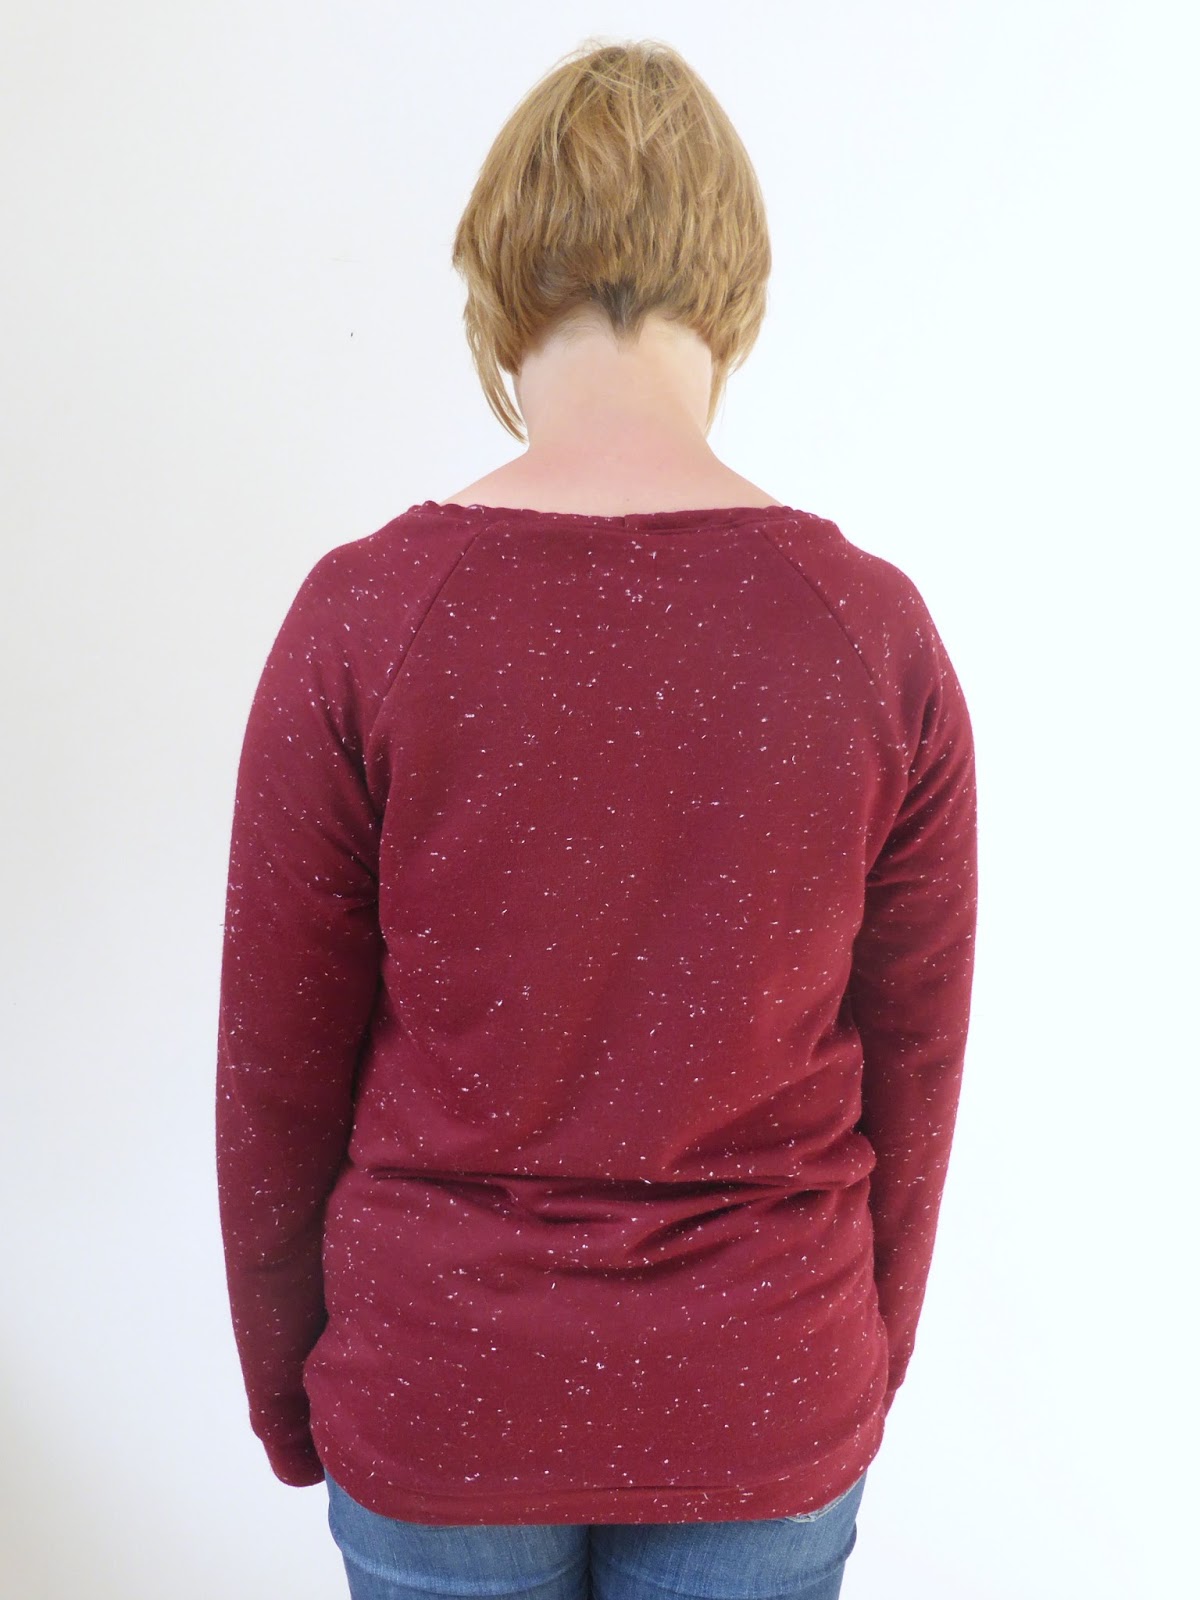
Scubalicious Linden

It's a Linden, Jim, but not (quite) as we know it...


It's a straight up View B. With a skirt. And pockets.

And darn it if it didn't turn out pretty cool.


The pockets are barely utilitarian - they're a bit too low - but in any case I only added them for the effect of those pleasingly flattering diagonal lines drawing the eyes down over the hips. Yes that's right I added useless pockets just coz they look good. They're kangaroo-style, lined with a light little scrap of jersey to reduce bulk (dat scuba be THICK).


Don't ask what that white blotch is on the fabric, I neither know nor, as it's on the inside, care.


Mmmm, lovely squishy scuba... It's cool but warm, soft but structured, drapes but doesn't cling... I edgestitched all the seams and turns to flatten out and sharpen up the 'bounce':


And it turned out just the right side of sack-like, stylish enough for work and comfy as ALL GET OUT.


Yes, the Linden dress is scubalicious and YUM.

Also of note:
  • these little boots are the best shoe purchase I have ever made.
  • figuring out how to use my phone as a camera remote is all well and good but I think what the resulting pictures demonstrate most clearly is my age. Seriously all this technology shit where will it end I ask you etc etc.


Follow

Tuesday, 21 April 2015

Full-bust adjustment: raglan sleeves

Hello! Today's post is a quickie tute for the full-busted, or those who sew for them :-) What with the proliferation of raglan patterns and their general on-trend stylishness, I wouldn't want anyone's fit worries to cause them to miss out!

To note before starting:  this is a variation on the no-dart full bust adjustment (FBA) outlined here. We'll skip over that part pretty quickly today in order to get to the raglan-specific bits. Refer back to that post for details if you need to.

OK, down to it. Grab your pattern, and we'll start with the front bodice. I'm using the Lane Raglan sweatshirt/tee pattern by Hey June, but of course any raglan-sleeved top will do.  Here it is in its original state:


Now perform your no-dart FBA, as described in detail in this post. The raglan front shoulder seam is a different shape from the 'standard' armhole, but the principle is exactly the same.


  1. Draw your adjustment lines
  2. Cut
  3. Spread out the pieces by the desired amount
  4. Slide some spare paper underneath and stick it all in place

Then complete the FBA by re-drawing the front shoulder seam to smooth it out:


Stick everything in place and cut out your adjusted front piece:


Now, onto the extra step necessitated by the raglan sleeve construction.

Because we've just changed the front shoulder seam on the bodice pattern piece (by lengthening it slightly), we also need to adjust the front shoulder seam on the sleeve pattern piece. Otherwise they won't match up properly at the underarm and your attempt at bosom-accommodating will be in vain.  We'll do this by determining how much length we need to add to the sleeve seamline, and then adding it :-)

So, firstly, measure the length of the shoulder seam on your adjusted front bodice.  It will be slightly curved - the easiest way to measure around the curve is to stand your tape measure on its side instead of laying it flat. Like this:


Note this measurement as precisely as possible.

Now take your sleeve pattern piece and before you do anything else, identify the front shoulder seam. We don't need to make any changes to the back! The front seam is usually marked with one notch and the back with two - but whatever the markings are, just make sure you are working on the correct side!  In this picture, my sleeve pattern has the front shoulder seam on the right hand side.


Measure and note the length of the front shoulder seam as accurately as possible.

Now, subtract this measurement (the length of the front shoulder seam on the sleeve) from the previous measurement you took (the length of the front shoulder seam on the adjusted bodice).  The seam on the sleeve pattern piece will be 1-2cm shorter, depending on the size of your FBA. Note down exactly how much shorter it is. This is the amount by which we will lengthen the front sleeve seam. In a couple of steps, I will refer to it as XX cm / YY inches.

Before you lengthen, trace the original curve of the front sleeve seam and underarm point onto a spare piece of paper:


Now, slide this piece of paper either downwards or outwards slightly, following the curve of the seam in the most 'logical' direction, positioning the new underarm point XX cm / YY inches away from the original underarm point. Like this:


As you can see, in this case I extended the seam downwards and out slightly. The curve of raglan sleeve seams varies from one pattern to another: when positioning the new underarm point, just follow the curve in the direction that seems easiest.  Sometimes, it might be necessary to re-draw the seam slightly to smooth it out - in this case, a good trick is to trace over the sleeve curve from a larger size of the original pattern. That way, you can change the length of the seam without deviating from the shaping of the original pattern.

And all that remains is to connect the new underarm point back to the side/underarm sleeve seam:


Finished! Go forth and sew your slightly-more-accommodating raglan tee!


What became of mine, you may be wondering?

Ahem. Yes. Sometimes, there is such a thing as too much slouch. Sometimes, one can even be unnecessarily zealous about adding room for the boobs.


Sometimes, one steams ahead with a fabric that has absolutely no stretch recovery, and ends up with a ridiculously oversized sweater with a humungously gaping back neckline which is only made wrinklier and worse by application of the elastic thread fix.


Ah well. You win some, you lose some.  I might shorten the sleeves and make it into a grandad-style cardi, but not any time soon. The weather has turned and now I must make ALL THE SUMMER THINGS.

Yay!

Hope it's helpful my dears :-)

Jo

Follow

Wednesday, 1 April 2015

KNICKERS

Today I'm going to write the sort of post that, when it pops up in my blog reader, generally makes me "mark as read" immediately and move on.

It goes like this...


"Oh my god I never thought I'd sew my own underwear but hey guys it's SO COOL because you hardly need any fabric and it's quick and FUN and seriously NO KNICKERS HAVE EVER FIT LIKE THIS before!!!!!!"

Here, have some more exclamation marks: !!!!!!!!!!!!!


OK, so the teenage indie kid in me - the one scornfully mocking the cool kids, safe in the knowledge I will never be one of them - has issues with the crazed way in which the sewing blogosphere has taken to making its own underwear. And now, in a way reminiscent of my little sister who was NOT copying me but just wearing whatever she wanted which HAPPENED to be exactly what I was wearing at the same time, I am going to state here that yes, OK, I made myself some knickers - but ONLY because I FELT LIKE IT.  The fact that all the other sewers in the entire internet have also made their own undies and raved about it is IRRELEVANT, ok?

I don't know, maybe I have some unresolved issues.

It's just underpants, after all.


We have here two different styles. I started out with these black and white ones, having been lured, finally, into buying a pattern on sale from Measure Twice Cut Once.  They're the Charlotte knickers, made with leftover poplin from my Darling Ranges dress - the only woven scraps I had that were large enough to cut the pieces on the bias.  In retrospect, though, poplin was probably not the best fabric to use: although it's nice and airy and cotton-y, it's a bit stiff.  But I think these will come into their own in summer, worn with dresses without tights, or loose-fitting shorts. When I finished them I didn't think they looked that comfortable, but they really are.


As you can see above (maybe - the colours don't make it easy to see details), I didn't manage a particularly neat finish. This pattern calls for the elastic to be serged to the right sides, then turned to the inside twice and topstitched without stretching. Perhaps it was my too-thick fabric choice, but I found all this folding and not stretching and stitching over all the gathers really difficult. I think next time, in addition to using a smoother fabric, I might just topstitch on some picot elastic instead.  In any case, I definitely need some more practice with these before they'll look like fancy pants.

In contrast, however, the second undergarment pattern I tried this week posed no finishing difficulties whatsoever, I suspect because I know what I'm doing with nicely-behaved knits. And look, two pairs immediately! One pair with optional topstitching, one without:


This is the new Barrie boy-cut briefs pattern by Kitschy Coo.  I jumped on it yesterday as soon as she released it - partly because I had in the meantime become slightly obsessive about underwear patterns, but also because everything Amanda does is awesome.  I've been wearing these all day (one pair, not both - I hope that's obvious...) and they are as advertised: super comfy, no-wedgie pants that stay put.  Plus, they are the absolutely ideal opportunity to use up large scraps of Lillestof - which Amanda also just happens to stock, in an array of brilliant prints, in her shop. (Click through at your own risk - it's all tantalisingly gorgeous).


Wait, I was dissembling there. "Ideal opportunity to use up scraps of Lillestof"?

Actually, I had been single-mindedly hoarding the scraps of Lillestof for exactly this purpose since last June.  And yes, I shall be wearing these garments simultaneously when summer comes. WHO WOULDN'T.

By the way, does anyone know why knicker patterns leave one end of the gusset unfinished and unstitched down (see picture above)?  I've read that it's to allow for a cotton gusset in non-cotton underwear, but that doesn't actually explain why it isn't finished/attached. Or that it's for ventilation, but - really?? The other, and most-cited reason is to avoid a seam where it could be bulky or uncomfortable - but then there are plenty of underwear patterns out there with a separate gusset pattern piece, which is finished with seams at both ends (like this). Wouldn't the bulk thing be an issue there too?  During my week of pants-sewing I have become increasingly - possibly unhealthily - curious about this question. If you can enlighten me at all, please do!

Well, to wrap up, I don't this post would be complete without a picture of them in action, would it?  Mid-rise for more coverage, and I utterly failed to get an acceptable picture of the back view.


I think there's more than enough on display here as it is, anyway.

OK, post over.  Have you crossed to dark side of sewing undergarments, too? Or are you resisting?


Follow

Wednesday, 25 March 2015

Two skirts and a cropped Linden

Exciting news guys!! I made two more office-appropriate skirts and a top that goes with!

NO WAIT COME BACK.


OK, so there's nothing earth shattering to see here.  But still, these three makes have had a disproportionately monumental impact on my wardrobe.  Here's the nitty gritty:

  • Top: Grainline Linden sweatshirt, view B, straight size 12, sleeves extended to three-quarter length. Made in a wool sweater knit from Paris that I gently washed and dried in order to deliberately felt it slightly, resulting in the absolutely perfect combo of body and drape for this sweater. It's all spongy!
  • Skirt 1, above: Betty from La Maison Victor 1/2015 - the pattern isn't available separately (yet) but if you want more details, they're selling fabric kits with a clear picture of the style here. Fabric is a stable medium-weight herringbone knit I picked up at The Fabric Sales last autumn. I'm not 100% sure but I think it's a wool mix.
  • Skirt 2, below: another Colette Zinnia v.2 in denim. Shortened, I can't remember by how much. The only other change I made was to do an exposed zip, mainly so I didn't have to go out shopping for an invisible one.


https://igcdn-photos-d-a.akamaihd.net/hphotos-ak-xaf1/t51.2885-15/10919335_1056136417735155_594032643_n.jpg


Pretty pleased with how that turned out, if I do say so myself - first exposed zip ever!


So anyway, I don't really have anything to say about the construction of these, they were all straightforward and turned out fine.  (Side comment though, every time I use a pattern from La Maison Victor I realise just how well put together the whole magazine is - the pattern pages are clear, the instructions are in tutorial format with diagrams and, give or take the odd blooper, the designs are usually pretty on trend and wearable. All good!)

No, the real deal here is the silhouette.


Basically, these two skirts are not that different from this one. (The denim one is not at all different!) They're high waisted and, with either gathers or pleats, flared. But while I'd always previously paired flared skirts with a fitted cardigan or top, as modelled in my previous post, ever since making this Linden I've chosen to wear all three skirts with it exclusively. Nothing else gets a look in. And it doesn't get boring - as you can see here, it's very easy to mix things up, just by changing shoes and jewellery choices.

Now I'm not sure I could say why I like this look of things so much. I just find it more comfortable, more fashionable I suppose, and in any case definitely more ME. The boxy, slightly cropped cut works for my shape in the way I want things to. I have to be honest though - this was a totally random, if pleasant, surprise.  Trying out Linden view B started as an experiment; I had no idea beforehand if I would like it or not.


I've never really felt fashion-literate. All that stuff about shapes and cuts and textures and styles, and that's all before we get to on trend or off. I know series like Colette's wardrobe architect are specifically there to help sewers think through many of these things, but I don't even know if I could have identified this silhouette, or any other, as 'my style', before actually wearing it.

It's all got me wondering. Is it inevitable, if we sew our own wardrobes, that we end up as our own individual fashion designers? And do we need to know what our own unique look is, in order to carry that off?


Follow

Friday, 6 March 2015

Big gingham Zinnia

Haha you guys - see how much I like wearing office clothes again?  This much:


That's my face for "f*** this getting appropriately dressed at 7am sh*t".  Yes, back to the office = back to the dress code. In my case it's not a particularly demanding dress code, but there is nonetheless a line - it falls somewhere in the middle of business casual - that can't be crossed. As I've expanded slightly around the waist since last winter (outrageously and inexplicably!*), some new clothes have been called for.

(*ok it's not inexplicable. I'm outraged nonetheless).

Now here's the thing. While I was off work last year, I enjoyed a long run of highly successful sewing. Almost everything I made during that time was a hit one way or another. I chalked it up to good luck and did my best not to tempt fate by getting smug. And, as expected, in the end that luck has started to turn: recently, the inspiration-sewing-wearing process hasn't been turning out quite so serendipitously well. Not badly, but still. And as I was sitting down to write this post, it struck me that that's probably not a total coincidence.

You see, from May until December I'd pretty much had time and free reign to both sew and wear whatever I wanted. Which I did. (I was going to say that I did so with relish - but honestly, relish didn't come into it. At some point in early June my incredibly helpful doctor advised me to find a hobby or creative pastime to keep myself occupied, not knowing that I was already spending my days obsessively, maniacally sewing as if my life, or at the very least my sanity, depended on it. I just sat there thinking: oh, I'd laugh - if only I could.)  It's hardly surprising really that with the time to plot, fit and sew, I turned out a bunch of things that could be worn immediately, comfortably and often. The clothes I sewed last year were clothes to put me at ease and make me happy.  While I won't credit them with saving my mental health (thank you, pharmaceuticals and therapy!), they did give me a real sense of my own style: those clothes were and are 'me' in a way I'd never quite been able to identify before.

They're also, pretty much without exception, not office appropriate.


This might sound blindingly obvious, but I'd never really thought about it before: I don't have a 'me' to wear to the office.  For all the time over the years I've spent there, I've never been able to just get up and get dressed for work without agonising over it. I know what I want and what makes sense - some kind of uniform of my own, a mix and match bunch of things I like that'll take the stress out of dressing - but I just can't quite get there.  And those recent makes, the ones that've felt like my luck's running out?  Of course, they've all been attempts to fill exactly that gap.

Take this skirt.  It's a Colette Zinnia. I've made it before and really like it - the shape of those pleats really works for me.  And woop woop check matching!  I won't exactly call that a disaster.


Indeed, all elements of this pointed to success. Inspiration hit immediately when I saw the big gingham in Ikea - I KNEW it was meant to be a mini-ish Zinnia. The pattern was tried and tested, the shape pairs well with cardis & simple tops, and in monochrome too - this should all add up to an ideal work skirt. And yet... I re-measured myself and went up a size. Guess what? It's slightly but irritatingly too big. The fabric of course is meant for upholstery, and as I should probably have guessed, it neither holds the pleats nor drapes particularly well. Worse, it wrinkles and doesn't iron nicely either.  My buttonhole placement isn't great and all in all it feels a little, er, homemade.


None of which means I don't wear it.  Maybe none of it is even that bad. I have come to realise that part of my problem with 'waisted' skirts is that I need the waistbands curved when they're frequently not (coincidental recent tutorials on that by Heather and Sunni). Or perhaps it's simply that given the choice I'd ALWAYS rather be wearing jeans, a sweatshirt and loud trainers instead of pretending to be tasteful in dresses.

Either way, I think it makes perfect sense that ambiguous feelings about the wearing will translate into mixed success in the sewing.  While I can muster up plenty of enthusiasm to sew pretty things for work - wrap dresses, shirt dresses, and plenty of excuse to wear them! - I can't help but feel that my underlying feelings about office wear in general might let these projects down.

What do you think? Would you agree? And what do you, wise readers, think I can do about it??

Because, let's face it - business casual is never going to get as casual as I want it to.


Follow